I tried my hands numerous times to bake a perfect bread. After a lot of hit and trial I finally figured out what goes into that perfect loaf of bread. Since then I have been experimenting with new recipes and have stopped buying bread from market. Its been half a year now and I oo don’t miss eating that crappy bread.
A lot of people say that they just cant get the bread right, the dough never rises. Its because the yeast is either expired or the temperature of water is not perfect for yeast to rise. Always check the colour of your yeast it should be whitish and not brown in colour. If its brown it means it is of no use, simply throw it in the bin. If you want to under yeast better you must read “All you ever wanted to know about yeast“. I have started using instant yeast which can be mixed with the dry flour and kneaded into a dough, leaving no room for any error. You can buy Instant yeast from our online store The Gourmet Shop.
I had earlier posted a recipe of White Sandwich bread which come out beautiful. But lately, I have tried to cut All Purpose Flour from my daily life, therefore eating Whole Wheat bread is always a better open. But to make a whole wheat bread is a little different. If you are using whole wheat flour or atta the bread comes out dense and bulky. The reason being that unlike All Purpose Flour Whole wheat flour doesn’t have that much gluten which is essential for making a airy light bread. Therefore, if you add additional gluten to the flour while kneading the bread will come out just amazing.
Directions:
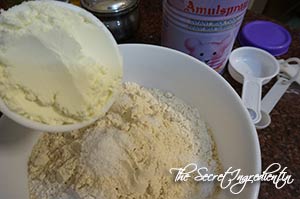
1. In a bowl add wheat flour and salt.

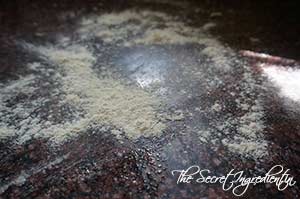
2. Also add milk powder, Gluten and oil. If you dont know what vital gluten looks like, its just like any other flour. You can always buy at our Online store.
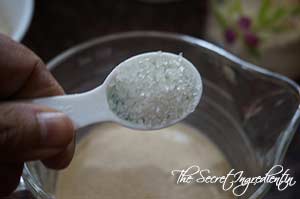
4. In a container take some lukewarm water. It should neither be hot nor cold, just hot enough to comfortably put your finger into it. The right temperature of the water is very important for yeast to activate. Put yeast into it. Along with yeast add some sugar.
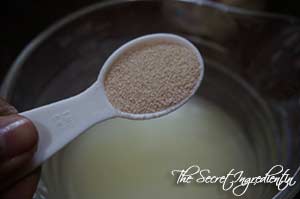
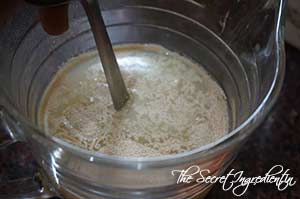
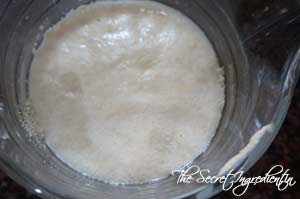
5. Give it a gentle stir with a fork and let the mixture sit and activate for 10 minutes or until you see some bubbles on top and mixture has become frothy and milky.
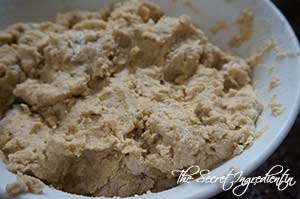
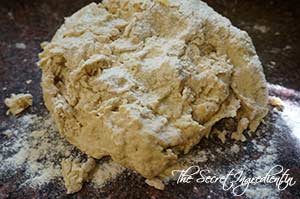
6. Add the proofed yeast to the flour little by little and mix till it comes together. You dont have to knead at this stage. Just mix it with hands or even a wooden spatula. Let this sit for 10-15 minutes. This is known as autolyze.

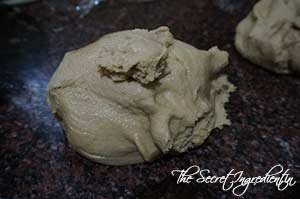
7. After 10-15 minutes dust your counter with some flour and place your dough on it and start to stretch and knead. This kneading is different than kneading a dough for roti. You have to knead for 10-15 minutes in order to gluten to develop. Read more about Bread baking techniques in “Basic Steps to Bake a Perfect Bread“
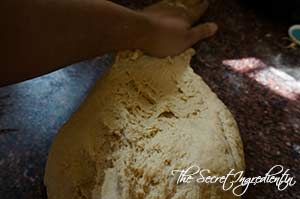
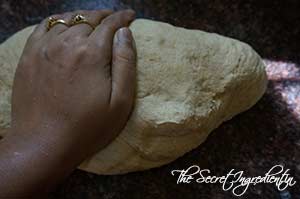
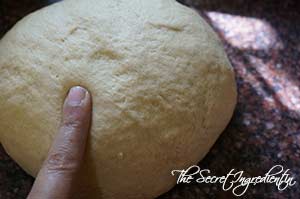
8. How would you know if you have kneaded the dough properly. Give it a finger test. Make a ball of dough and slightly poke with your finger if you see it bounces back it means its ready to be proofed. Remember the bounce will be very slight and if it doesn’t happen you need more kneading time. Start again and check with your finger.
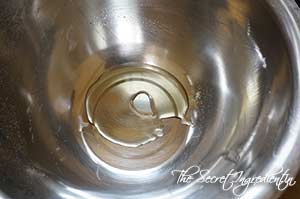
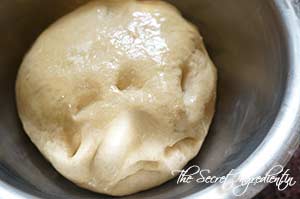
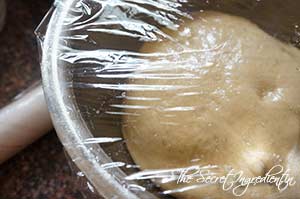
9. Transfer the dough to a greased bowl. Cover with a kitchen towel or cling wrap. Turn the dough upside bowl so that it is also coated with a layer of oil. The size of the bowl should be big because on proofing the dough will become double in size and there should be ample room for it in the bowl. Let it sit for an hour or so to double up in size. The time of proofing depends on the temperature of the kitchen. If the weather is cold it might take longer and if its hot the dough will rise quickly so time it accordingly.
10. Punch it down and deflate the dough. Knead for another 5-7 minutes. Divide the dough into two.
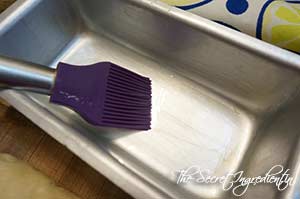
11. Grease two bread pan with oil and dust with some flour. I have used two 8 inch rectangular bread mould
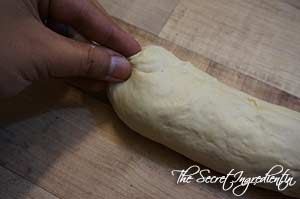
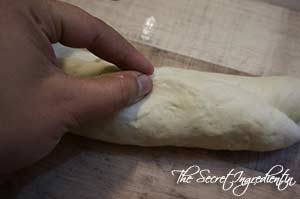
12. Roll half dough into a circle using a roller pin.

13. Take one end and roll it together . Fold in the sides and pinch the seam.

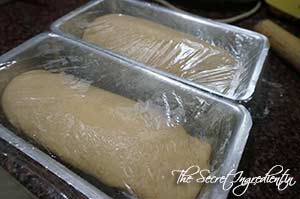
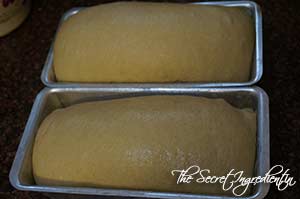
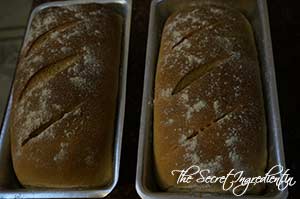
14. Place the rolled dough in the baking pans with seam side down. Cover the dough loosely with a towel or cling wrap and let it rest again for 30 minutes or till it rises again. The dough will reach the lip of the pan that’s when you have to bake it. Preheat the oven to 180 degree Celsius for 10 minutes. (Learn more about Oven temperatures and Conversions)
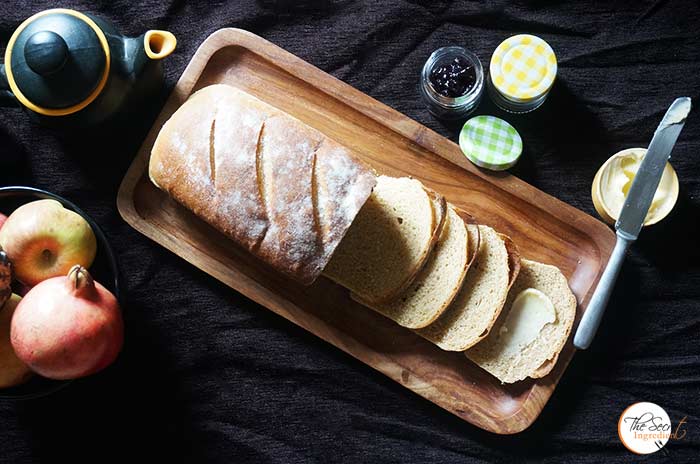
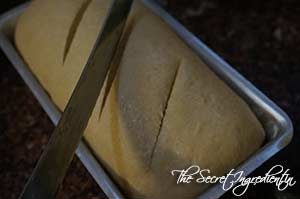
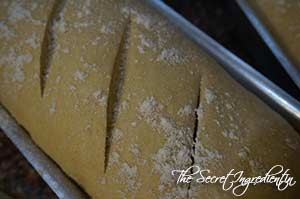
15. If you wish you can score the bread with a sharp knife. You can choose to brush the top gently with milk wash or egg wash. This time I chose to just dust it with flour for a rustic look.
16. Bake it in the center rack of your preheated oven for 35-40 minute. Change sides half way for even cooking. If you feel your bread is browning too fast tent it with aluminium foil and continue to bake.
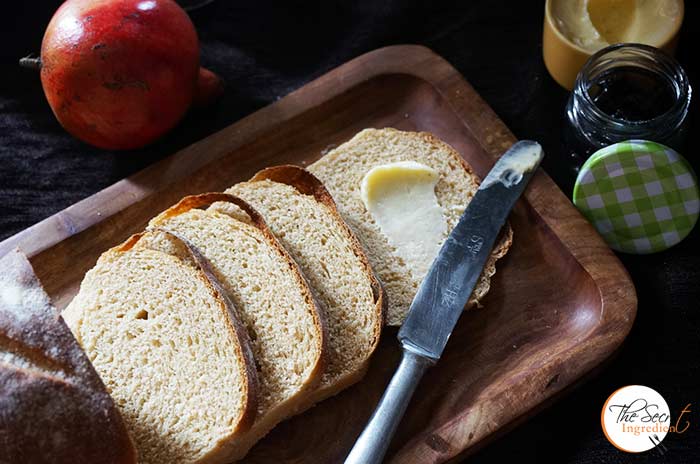
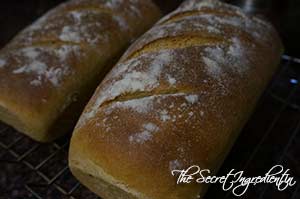
17. Remove from the tin after 5 minutes you have removed them from the oven or else the bottom with become soggy. Let the bread cool down completely on a wire wrack before slicing it.
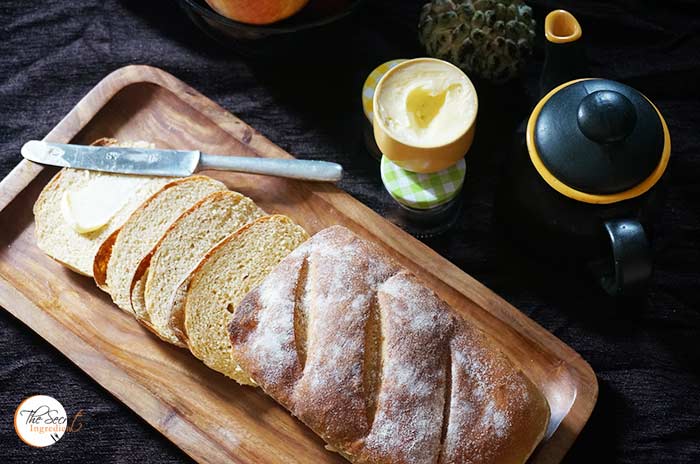
18. Smear some butter and enjoy the delicious home made whole wheat bread.
You can also try Honey Oats Bread, Rosemary Garlic Foccacia Bread, Domino’s style Garlic Breadsticks, Vegetarian homemade Pizza, Russian Bublici, Chinese Black Sesame Steamed Buns, Cherry Focaccia Bread with Rosemary and Sea Salt, Cinnamon Raisin Bread, Beetroot Bread with Garlic and Thyme.
Sending this Bread to YeastSpotting
[whohit]WholeWheatBread[/whohit]
- 2 &1/4 tsp Instant Yeast
- plus 1 tsp of Sugar
- 2 tsp of Salt
- 3 Tbsp Vegetable Oil
- 1 &1/4 cup Warm Water, may be a little more
- 3.5 cups Whole Wheat Flour or Atta
- 1/3 cup Dry Milk Powder
- 2 tbsp Vital Gluten
- In a bowl add wheat flour and salt.
- Also add milk powder, Gluten and oil. If you dont know what vital gluten looks like, its just like any other flour.
- In a container take some lukewarm water. It should neither be hot nor cold, just hot enough to comfortably put your finger into it . The right temperature of the water is very important for yeast to activate. Put yeast into it. Along with yeast add some sugar.
- Give it a gentle stir with a fork and let the mixture sit and activate for 10 minutes or until you see some bubbles on top and mixture has become frothy and milky.
- Add the proofed yeast to the flour little by little and mix till it comes together. You dont have to knead at this stage. Just mix it with hands or even a wooden spatula. Let this sit for 10-15 minutes. This is known as Autolyse.
- After 10-15 minutes dust your counter with some flour and place your dough on it and start to stretch and knead. This kneading is different than kneading a dough for roti. You have to knead for 10-15 minutes in order to gluten to develop.
- How would you know if you have kneaded the dough properly. Give it a finger test. Make a ball of dough and slightly poke with your finger if you see it bounces back it means its ready to be proofed. Remember the bounce will be very slight and if it doesn’t happen you need more kneading time. Start again and check with your finger.
- Transfer the dough to a greased bowl. And cover with a kitchen towel or cling wrap. Turn the dough upside bowl so that it is also coated with a layer of oil. The size of the bowl should be big because on proofing the dough will become double in size and there should be ample room for it in the bowl. Let it sit for an hour or so to double up in size. The time of proofing depends on the temperature of the kitchen. If the weather is cold it might take longer and if its hot the dough will rise quickly so time it accordingly.
- Punch it down and deflate the dough. Knead for another 5-7 minutes.
- Grease your bread pan with oil and dust with some flour.
- Roll the dough into a circle using a roller pin.
- Take one end and roll it together . Fold in the sides and pinch the seam.
- Place the rolled dough in the baking pan with seam side down. Cover the dough loosely with a towel or cling wrap and let it rest again for 30 minutes or till it rises again. The dough will reach the lip of the pan that’s when you have to bake it. Preheat the oven to 180 degree Celsius for 10 minutes.
- If you wish you can score the bread with a sharp knife. You can choose to brush the top gently with milk wash or egg wash. This time I chose to just dust it with flour for a rustic look.
- Bake it in the center rack of your preheated oven for 35-40 minute. Change sides half way for even cooking. If you feel your bread is browning too fast tent it with aluminium foil and continue to bake.
- Remove from the tin after 5 minutes you have removed them from the oven or else the bottom with become soggy. Let the bread cool down completely on a wire wrack before slicing it.
- Smear some butter and enjoy the delicious home made whole wheat bread.